The french braid: its versatile, its polished, its out of your face! According to The French Braid, a website dedicated to this stylish art, french braiding has been around since 400B.C. Hair styling was one of the most popular arts in the 18th century and you would often see braiding in paintings and sculptures.
But this style isn’t cheap. If you were to get it done at a salon, pricing would start at $30. Here there will be a tutorial so that salon expenses can be a thing of the past!
Learning how to french braid can be a useful skill. Olivia Michel, a stylist at The Bluebird Salon and Shop in downtown San Luis Obispo said that braiding prices vary depending on the stylist. She gave some tips for learning how to do it yourself. “Practice! The first time it will take a little while, but the more you practice, the better you will get,” stated Michel.
It’s a great style for people on the go. Jessamyn Liu, a California Polytechnic State University San Luis Obispo student said, “I do know how to french braid my hair. I learned two years ago from my sister.”
Gwen Olsen learned how to french braid by watching a coworker do her daughter’s hair back in the 1970s. ” I began braiding my daughter’s hair when she was about three. It felt awkward in the beginning but with practice became as easy as a regular braid, ” said Olsen. ” You can easily ‘glam up’ a french braid for a formal occasion just by embellishing with flowers or jeweled combs or barretes.”
So how can you create this look? The tutorial begins now!
MATERIALS:
- Brush
- Hair tie
- Wave enhancer (optional)
HOW TO:
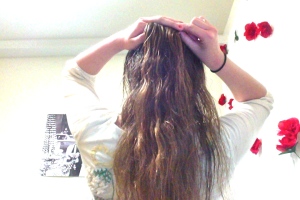
- Make sure your hair is combed out. I usually braid my hair when it is slightly damp. This allows for it to have soft waves once the braid is dry and removed. I like to use a curl enhancer because it controls the possibility of frizz. I use Be Curly by Aveda. (Aveda is great because they use all natural ingredients and they do not test on animals!)


- Separate a small section at the top of your head, use a brush to smooth if necessary. This will be the start of your braid!

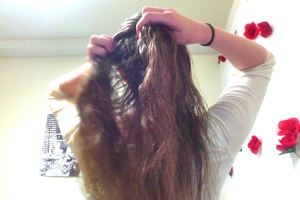
- Separate this section into three parts and begin braiding like a normal braid, starting from the right and crossing over the center piece.


- After you have done one complete cross over with all three sections, begin gathering hair from the sides to incorporate into your braid. Try and keep the gathered sections small and smooth.

- Continue down the length of your hair, it will get easier as you work down. As you braid, the three sections will become larger and more distinct.

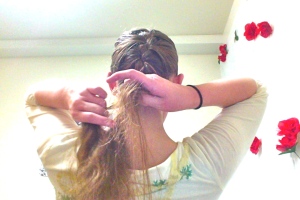
- This is where your arms begin to tire and it becomes harder to reach. Many people try braiding from over their shoulder at this point, but that could result in a twisted braid which will not lay flat. The best option is to keep straight back if you can. You will begin to notice that you are running out of hair to pick up. At this point, finish the braid as if it were a normal three-piece braid.

- Now you are coming to the end of the braid. You can end it as high or as low as you please. Secure the end with a hair tie, and there you have it!!
Et Voila!
Whether you are an athlete out on the field rocking dreadlocks or a school girl on the playground styling pigtails, braids are adroit at being perfect for any occasion. Knowing how to do this craft is useful for an array of people!


